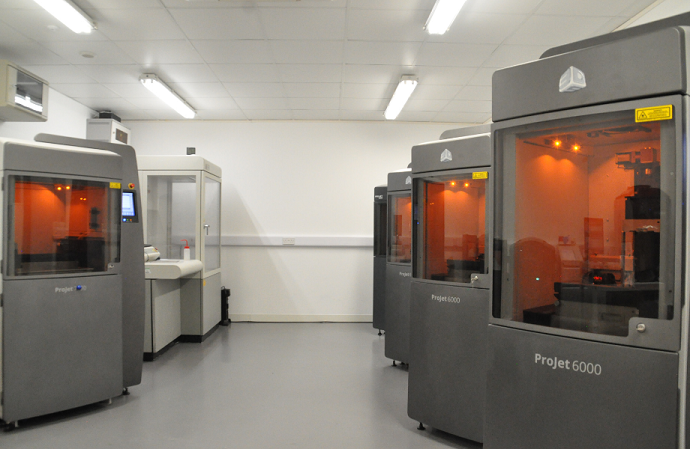
Prototype Projects began using SLA in the mid-90s. They have made continual investments in their 3D Printing technologies over the years and significantly expanded their offering in 2016 by opening a dedicated 3D Printing Suite. They are now a market-leading expert in the field of 3D printing, but they understand not all their customers are as familiar with it. In particular, recent graduates may not appreciate the full capabilities and the important differences between various 3D printing technologies.
Furthermore, although 3D printing is usually associated with prototyping and product development (Additive Prototyping, AP), there are many other fields where 3D printing offers major advantages including low-volume production (Additive Manufacturing, AM).
They have therefore prepared this Beginner’s Guide to 3D Printing. It is intended to be educational for newcomers to 3D printing, as well as those whose knowledge might benefit from updating.
What is 3D printing?
The process normally starts with a part file that has been created using solid modelling (3D CAD) software. Alternatively, an existing part can be scanned and the resultant point cloud refined with CAD software to produce a part file.
Typically, customers send them a STEP or STL part file, which they convert into a format that can be downloaded to one of their 3D printers. Note that each 3D printing technology (and they have five in-house) has its own requirements in terms of support structures and other parameters, so they need to know which 3D printing technology they will be using before preparing the 3D print file.
Once the build data is ready and the 3D printer has been set up, including being loaded with the specified material, the 3D printing process can start.
3D printers build parts layer by layer. Some produce an entire layer in one ‘hit’ while others use a moving spot of laser light to trace a series of lines for printing each layer.
After the build process is complete, the part is removed, cleaned and any support structure removed. Then, depending on the 3D printing technology, the part may need to be cured in a UV oven. Finally, secondary finishing operations are carried out if required.
Every part they 3D print is visually inspected after printing, then again after finishing and prior to packing and dispatch. Critical functional parts can be inspected using their co-ordinate measuring machine (CMM) so they can provide detailed inspection reports if required.
Choice of materials
Manufacturers of 3D printers recommend materials for their machines. Some of Prototype Projects' 3D printers operate with photopolymer resins (light-curing liquids), while others use a fine powder. With five different 3D printing technologies in-house, they have the potential to offer different materials.
However, to provide consistently high-quality parts and achieve a rapid turnaround, they strive to get their 3D printed parts ‘right first time’, so they need to know which machine settings to use and exactly what to expect from each combination of 3D printer and material. They have therefore conducted market research and undertaken in-house trials so they can offer a range of materials that fulfil their customers’ requirements.
Depending on which 3D printing technology is utilised, they can build clear, coloured, or opaque parts. Some materials can tolerate harsh operating environments, including elevated temperatures, sunlight, and moisture. They can even 3D print parts that are biocompatible and withstand sterilisation. When considering 3D printing, the best approach is to decide what material properties are required for the part, then look at which 3D printing technology can achieve that goal.
Choice of finishes
3D printed parts can be finished in a number of different ways, depending on the application requirements and material – bearing in mind that the material relates to the 3D printing technology. For a visual model, a part might be sanded, primed and painted, or a clear part might be polished and lacquered for a high degree of clarity. Parts built using Selective Laser Sintering (SLS) can also be dyed, with black being the most popular option.
Other finishing options include light bead blasting, clear lacquer to seal porous surfaces, and blackout/RFI/EMC coatings on internal surfaces. They can also outsource specialist finishing processes such as electroless plating and vacuum metallisation.
Which technology?
Most 3D printing bureaux focus on one technology. Unfortunately, there is no single 3D printing technology that is ideal for every application. So, rather than compromise by restricting themselves to one technology, they have invested in five. This puts them in the best position to serve all of their customers’ 3D printing requirements. Moreover, if you are not sure which technology would be optimum for your project, they can give you an unbiased opinion to ensure you get parts that meet your expectations and perform as required.
Below they have outlined the five 3D printing technologies available at Prototype Projects, with the advantages and limitations of each. There are also some example applications, but each technology is capable of being used for many, many more applications across a wide variety of market sectors. As mentioned above, the best starting point is to consider the material properties required, then look at which 3D printing technology offers what you need.
Selective Laser Sintering (SLS)
SLS produces uses a laser to fuse fine white nylon powder. The technology is capable of building parts with complex geometries and fine details. Parts have high strength (higher than SLA parts), stiffness, long-term dimensional stability, chemical resistance and abrasion resistance – which makes them good for moving assemblies. Prototype Projects use PA2200 (base PA12) material which is biocompatible according to EN ISO 10993-1 and USP Class VI and approved for food contact in compliance with the EU plastics directive 2002/72/EC.
Note that material properties are anisotropic, so care is needed when choosing the build orientation. While the technology is sufficiently accurate for most applications, it is slightly less accurate than SLA. If porosity is of concern, parts can be sealed with clear lacquer, or the part can be vapour polished by a specialist although this process is suitable for all geometries.
SLS parts are used for visual models, functional prototypes, and end-use applications. Examples of SLS parts include cases/enclosures, brackets and ducting.
Stereolithography (SLA)
Stereolithography apparatus (SLA) builds parts by curing photopolymer resins with a beam of laser light. Compared with SLS it is more accurate, produces smoother surfaces, and material properties are virtually isotropic. In addition, finished parts are not porous. They operate with three different materials to give customers a choice of material properties.
SLA parts are not as strong or durable as SLS parts. Also, if customers want to take full advantage of the clear material Accura ClearVue, hand polishing is necessary. Accuracy is good but if very high accuracy is required for extremely fine details, they recommend 3D printing the bulk of the part with SLA and using PµSL (see below) to 3D print inserts that are bonded in place afterwards.
Typical applications for SLA parts include consumer products, medical devices, fluidics, prototypes for functional testing, master patterns for vacuum casting.
Projection Micro Stereolithography (PµSL)
PµSL (pronounced ‘puzzle’) builds parts, one layer at a time, by curing a liquid photopolymer resin with ultraviolet light. A single flash cures an area of photopolymer, which is quicker than tracing over the area with a spot of laser light. The PµSL optics enable very high resolution to be achieved (±10µm in X and Y), and the layer thickness is smaller than for other 3D printing technologies (5-40µm). Ultra-fine details can therefore be produced, and surfaces are extremely smooth. If necessary, the printer’s bed is moved in the XY plane so as to cure wider areas with multiple projections of light.
They operate three materials in their PµSL 3D printer, including HTL high-temperature resin and BIO resin, which is biocompatible for non-implantable medical applications and can be sterilised. Because of the exceptionally smooth surface finish, parts seldom require sanding or other hand-finishing operations.
For similarly sized parts, PµSL would be slower than other 3D printing technologies. However, PµSL is usually only selected for 3D printing small parts), so the build time tends not to be an issue, the bed size is 100x100x75, although they recommend parts should not exceed 20mm in Z.
With its ability to achieve very high accuracy and fine detail, PµSL builds parts that would not be possible with other 3D printing technologies. Consequently, it is used for a wide variety of applications including concept models, functional prototypes and end use parts. PµSL is popular for microfluidics as well as medical devices and life sciences applications.
PolyJet
PolyJet is a multi-material 3D printing technology in which different materials can be printed simultaneously and materials can be combined to create ‘intermediate’ grades. PolyJet print heads spray droplets of light-curable photopolymer resins in a similar way to an inkjet printer. The technology is quick, versatile and cost-effective for producing aesthetically pleasing, detailed prototype parts with smooth surfaces.
Parts produced with PolyJet will be more expensive, like-for-like, than parts produced using SLS, SLA and DLP. However, PolyJet is typically used for producing parts that cannot be 3D printed using those other technologies. Also, parts tend not to be as strong as SLS parts, and they can distort if subjected to long-term exposure to heat, sunlight or humidity. Note that PolyJet parts are slightly anisotropic and porous, though they can usually be sealed by lacquering.
PolyJet, also known as material jetting, is often chosen for producing concept models, visual models, functional prototypes, and jigs and fixtures. The technology is excellent for simulating overmoulding for consumer goods, or for functional parts requiring integral seals/gaskets. Depending on the environmental conditions, PolyJet can be used for low-volume production of end-use parts.
Digital Light Projection (DLP)
DLP is similar to SLA in that parts are built layer-by-layer from photopolymer resin. However, DLP is much quicker because an entire layer is cured in one ‘hit’ rather than using a spot of laser light. Parts have good accuracy, are non-porous and virtually isotropic. Compared with SLA, we offer a wider range of materials, including one that withstands elevated temperatures (>300°C) and another that is elastomeric (65 Shore A).
DLP technology is slightly less versatile than SLA, in terms of the part geometry that can be 3D printed, and the build envelope is smaller.
Typical applications for DLP 3D printing include parts for use in high-temperature environments, durable end-use parts, and jigs and fixtures. In most cases, customers choose to use DLP because they need specific material properties.
Assembly options
As specialists in prototyping, model making and low-volume manufacturing, Prototype Projects' skills are far broader than just 3D printing. As a result, they can assemble 3D printed parts with other 3D printed parts, CNC machined parts, proprietary parts supplied by the customer, electrical/electronic componentry or standard off-the-shelf components such as threaded inserts.
For visual models that need to look just like the ‘real thing’, they can apply text, symbols, logos or other graphics.
Complementary technologies
Earlier they mentioned that no single 3D printing technology is perfect for every application. Likewise, 3D printing is not a panacea. Often a customer’s project will require contributions from not only our 3D printing suite but also our CNC machining, vacuum casting and model making teams.
Furthermore, if a customer’s prototype needs a component or process that they cannot tackle in-house, they can outsource it to one of the suppliers in their trusted network of specialists. As a result, customers view them as their one-stop-shop for prototyping.
Conclusion
Hopefully, the above guide, together with the information on other pages to which they have linked, will give you a good understanding of 3D printing. Nevertheless, if you have any questions, you are welcome to get in touch. You can talk to a member of their technical team over the telephone, via a video call or in person. You can also have a tour of the facilities if you want to see for yourself what they do and how they do it.
Talk to us
If you would like to discuss what the optimum manufacturing technology might be for your project, contact us on 01763 249760.


